
Every API tutorial hits the same wall: the interesting examples need a paid key, so they get replaced with a mock server and the reader learns nothing about real payloads. Home Assistant fixes that. It runs on hardware you own, exposes a documented REST and WebSocket API, and produces genuinely messy real-world data. What does a properly typed client for it look like?
Quick take: Home Assistant entity states arrive as strings with an untyped
attributesbag. Model them as a discriminated union keyed on the entity domain (light.,sensor.,climate.), validate at the boundary with Zod, and treatunavailableandunknownas first-class states rather than errors. Seed with one REST call to/api/states, then subscribe over WebSocket for updates.
What Does a Home Assistant State Actually Look Like?
Ask /api/states for a single light and you get this:
{
  "entity_id": "light.kitchen_ceiling",
  "state": "on",
  "attributes": {
    "brightness": 204,
    "color_temp_kelvin": 3000,
    "supported_color_modes": ["color_temp"],
    "friendly_name": "Kitchen Ceiling"
  },
  "last_changed": "2026-09-08T19:42:11.883012+00:00",
  "last_updated": "2026-09-08T19:42:11.883012+00:00",
  "context": { "id": "01J7...", "parent_id": null, "user_id": null }
}
The envelope is identical for every entity in the system. The attributes object is where it stops being identical, a light has brightness, a thermostat has current_temperature and hvac_action, a plain sensor has unit_of_measurement. That's the whole modelling problem in one object.
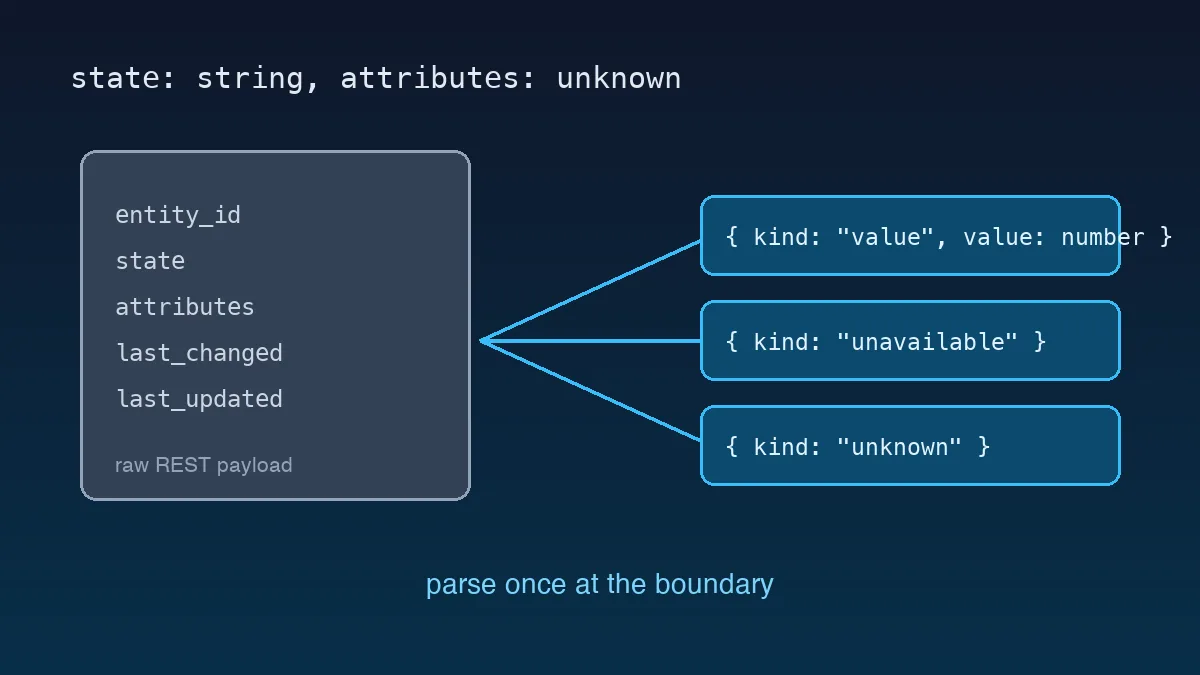
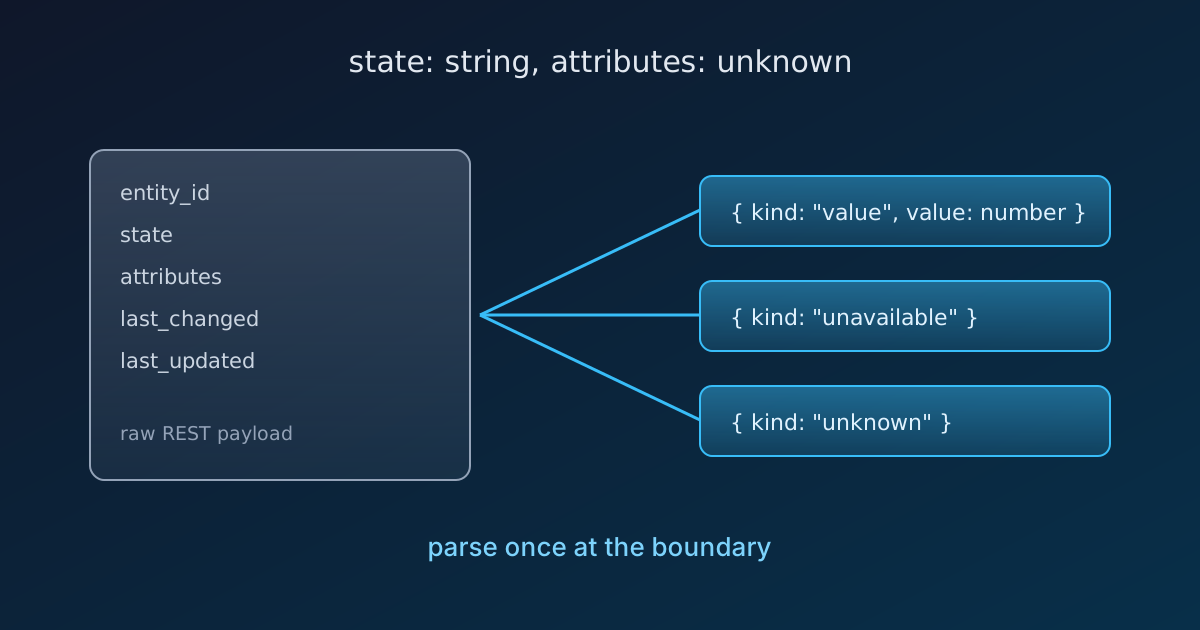
Two details bite people immediately. First, state is always a string, even for numeric sensors, because the state machine caps it at 255 characters and stores nothing else. Second, "unavailable" and "unknown" are legitimate values for any entity at any time. A device losing power produces "unavailable", not an HTTP error, and code that assumes otherwise breaks the first time somebody unplugs something.
Modelling the Envelope
Start with the shared shape, then narrow per domain:
type EntityDomain = "light" | "sensor" | "climate" | "switch" | "binary_sensor";

interface BaseState<D extends EntityDomain, A> {
  entity_id: `${D}.${string}`;
  state: string;
  attributes: A & { friendly_name?: string };
  last_changed: string;
  last_updated: string;
}

interface LightAttributes {
  brightness?: number;
  color_temp_kelvin?: number;
  supported_color_modes?: string[];
}

interface SensorAttributes {
  unit_of_measurement?: string;
  device_class?: "temperature" | "humidity" | "power" | "energy";
  state_class?: "measurement" | "total" | "total_increasing";
}

type LightState = BaseState<"light", LightAttributes>;
type SensorState = BaseState<"sensor", SensorAttributes>;
type AnyEntityState = LightState | SensorState;
The template literal type on entity_id is doing real work here. Because light.kitchen_ceiling is assignable to `light.${string}` and nothing else in the union matches it, a plain string check narrows the type:
function isLight(s: AnyEntityState): s is LightState {
  return s.entity_id.startsWith("light.");
}
No discriminant field required, and no cast. The entity ID already carries the tag, which is the small elegance that makes this API pleasant to type.
Handling unavailable Without Poisoning Every Call Site
The temptation is to type numeric sensors as number and deal with "unavailable" somewhere else. Resist it. Model the three cases explicitly and parse once:
type Reading =
  | { kind: "value"; value: number; unit?: string }
  | { kind: "unavailable" }
  | { kind: "unknown" };

function readNumeric(s: SensorState): Reading {
  if (s.state === "unavailable") {
    return { kind: "unavailable" };
  }
  if (s.state === "unknown") {
    return { kind: "unknown" };
  }
  const value = Number.parseFloat(s.state);
  if (Number.isNaN(value)) {
    return { kind: "unknown" };
  }
  return { kind: "value", value, unit: s.attributes.unit_of_measurement };
}
Now the compiler forces every consumer to decide what a missing reading looks like on screen, which is exactly the decision a dashboard has to make anyway. A gauge showing NaN because somebody's Zigbee sensor dropped is the failure this prevents, and it's a failure I've shipped more than once. Wiring those three states into a live view is the next problem, and that's a real-time React dashboard.
Validating at the Boundary With Zod
Types describe what you expect. They don't check it. Home Assistant payloads shift between releases and vary by integration, so validate where data enters:
import { z } from "zod";

const baseState = z.object({
  entity_id: z.string().includes("."),
  state: z.string().max(255),
  attributes: z.record(z.unknown()),
  last_changed: z.string().datetime({ offset: true }),
  last_updated: z.string().datetime({ offset: true }),
});

const sensorState = baseState.extend({
  entity_id: z.string().startsWith("sensor."),
  attributes: z.object({
    unit_of_measurement: z.string().optional(),
    device_class: z.enum(["temperature", "humidity", "power", "energy"]).optional(),
  }).passthrough(),
});

export type SensorStateParsed = z.infer<typeof sensorState>;
.passthrough() matters more than it looks. Integrations add attributes freely, and a strict schema that rejects unknown keys will fail on somebody else's install for no good reason. Validate the fields you rely on, let the rest through untouched.
Subscribing Over WebSocket
REST gives you a snapshot. For anything live you want the WebSocket API, which has an unusual handshake, the server speaks first:
const socket = new WebSocket("ws://homeassistant.local:8123/api/websocket");
let id = 1;

socket.addEventListener("message", (event) => {
  const msg = JSON.parse(event.data as string);

  if (msg.type === "auth_required") {
    socket.send(JSON.stringify({ type: "auth", access_token: TOKEN }));
    return;
  }
  if (msg.type === "auth_ok") {
    socket.send(JSON.stringify({
      id: id++,
      type: "subscribe_events",
      event_type: "state_changed",
    }));
    return;
  }
  if (msg.type === "event") {
    const { entity_id, new_state } = msg.event.data;
    console.log(entity_id, new_state?.state);
  }
});
Every command you send needs a monotonically increasing id, and the reply carries the same one, so a small Map<number, PendingCommand> is enough to correlate responses. Reconnection is the part worth taking seriously: Home Assistant restarts on every configuration reload, so your client will lose the socket regularly. Exponential backoff plus a fresh /api/states fetch after each reconnect keeps state consistent, because events that fired while you were disconnected are simply gone.
Getting an Instance to Point This At
All of this assumes a running Home Assistant with a token. If you don't have one, the install is genuinely an evening's work on a Raspberry Pi or in Docker. Create the long-lived token from your profile page afterwards, and keep it server-side, it's a full-control credential and it belongs in an environment variable, never in a client bundle.
The payoff for the effort is a test target that behaves like production APIs do, with intermittent devices, inconsistent attribute shapes, and states that genuinely change while you're watching. Mock servers never taught me anything about reconnection. A Zigbee sensor going dark behind a fridge taught me in one evening.